
PC Status Monitor
In this project, I build a DIY PC status monitor that displays live system values from a Windows PC on an external display using an ESP32.
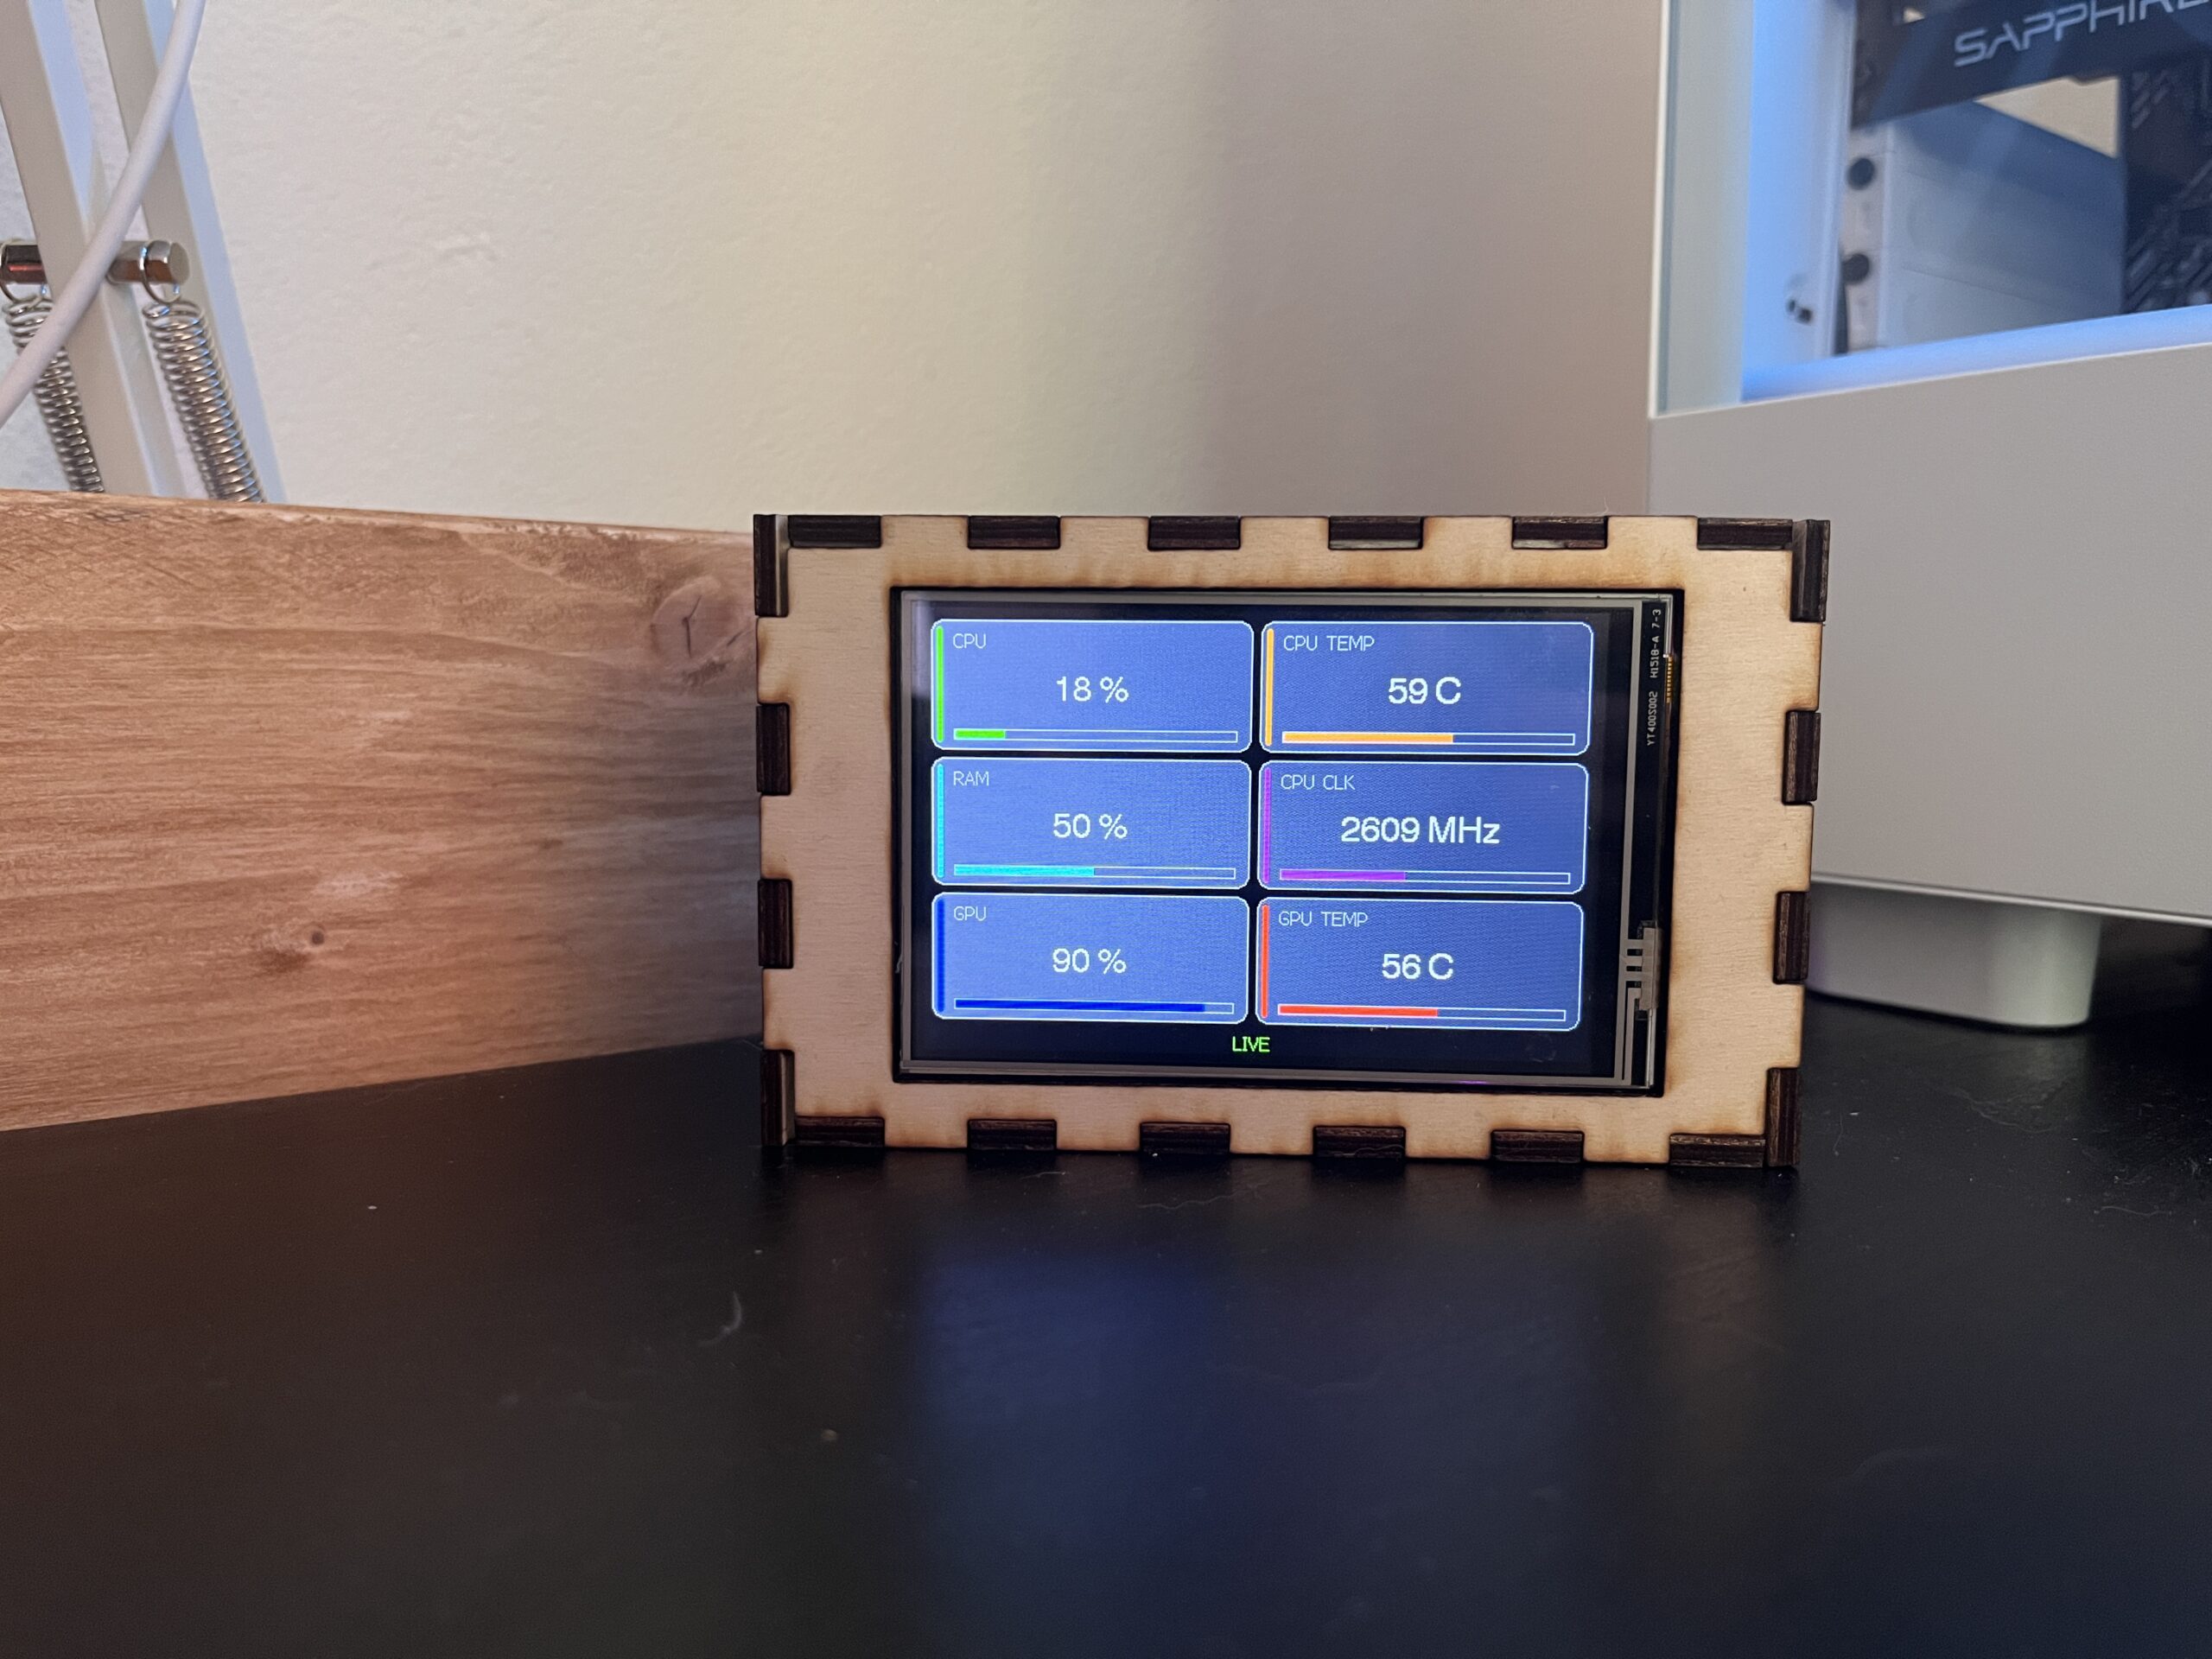
The monitor shows CPU usage, RAM usage, GPU usage, CPU temperature, GPU temperature, and live CPU clock speed. The data is collected on the PC, sent over USB serial, and displayed on a small touchscreen display inside a laser-cut enclosure.
1. Project Idea
The goal is to create a small external display that shows live hardware values from my PC. Instead of opening monitoring software on the main screen, the most important values are always visible directly on the desk.
For this build, I reused a leftover display and an ESP32 from my RGB controller project. This made the electronics part easier and allowed me to reuse components that I already had available.
2. How the System Works
The system is split into two parts. The Windows PC reads the live hardware data, while the ESP32 receives the values and updates the graphical dashboard on the display.
In this version, the monitor displays CPU usage, RAM usage, GPU load, CPU temperature, GPU temperature, and live CPU clock speed. The data is updated regularly, so the display works as a compact external dashboard.
3. Required Parts
- ESP32 development board
- SPI TFT display
- Dupont wires
- USB cable for power and serial communication
- Laser-cut enclosure
- Double-sided tape for fixing the display and ESP32
4. Wiring and Display Setup
I connected the display to the ESP32 using Dupont wires. For the wiring concept, I reused the display setup from my previous RGB controller project. This helped keep the build simple because the display and ESP32 configuration were already tested.
5. Enclosure and SVG File
Because the housing is clearly visible on the desk, I decided to laser cut the enclosure. The case was designed with a tight fit so the parts can be assembled cleanly and the display sits securely in the front opening.
The display and ESP32 are fixed inside the case with double-sided tape. Cable management is kept simple, and the final result is a compact desktop PC status monitor.
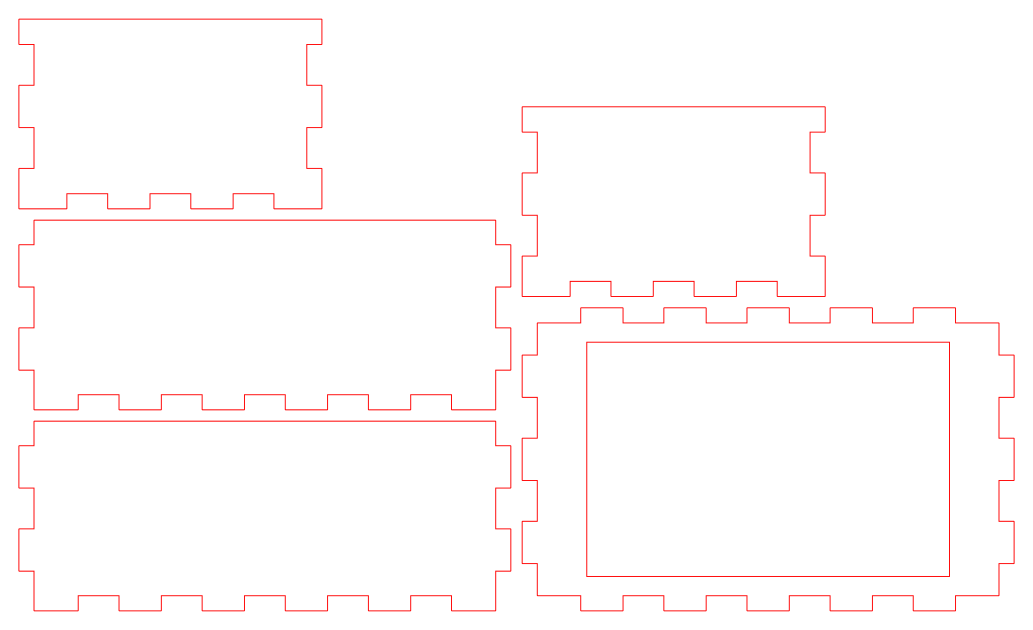
Laser-cut enclosure SVG with a 96 mm × 62 mm display cutout.
6. Windows Setup
- Install and start LibreHardwareMonitor.
- Enable the LibreHardwareMonitor web server or JSON endpoint.
- Install Python and the required packages for serial communication and system monitoring.
- Connect the ESP32 to the PC with a USB cable.
- Check the correct COM port in the Arduino IDE or Windows Device Manager.
- Start the sender workflow so the PC values are transmitted to the ESP32.
7. ESP32 Firmware Overview
The ESP32 firmware waits for live data from the PC over USB serial. When valid data is received, the values are stored and the display dashboard is refreshed.
Example serial data format
8. PC Sender Workflow
The PC sender script collects live system values from the operating system and from LibreHardwareMonitor. After the values are collected, they are converted into a compact data message and sent to the ESP32 through USB serial.
9. Starting and Stopping the Monitor
For daily use, the project can be started with a simple start workflow. This opens LibreHardwareMonitor and then starts the PC sender script. Before using it for the first time, the COM port must be adjusted to match the connected ESP32.
10. Final Code Files
The final project uses two software parts. The ESP32 sketch runs on the display controller and receives the PC data over USB serial. The Python script is shown here as downloadable/copyable code only.
pc_status_monitor.ino
This Arduino sketch runs on the ESP32. It initializes the TFT display, receives serial data from the Windows PC, parses the values, and updates the dashboard layout.
pc_sender_skript.py
This Python sender script runs on the Windows PC. It reads CPU and RAM values with psutil, reads CPU/GPU temperature and GPU load from the LibreHardwareMonitor JSON endpoint, and sends the values to the ESP32 over USB serial.
11. Common Problems
The display stays white
Check the display pin setup, display driver, power, backlight connection, and SPI pin assignment.
The PC cannot connect to the ESP32
Close the Arduino Serial Monitor, check the COM port, and reconnect the ESP32 if the port changed.
Temperatures or GPU values are missing
Make sure LibreHardwareMonitor is running and the required sensors are visible.
CPU clock speed does not look correct
Some systems report nominal speed instead of live boost speed. Use the values from LibreHardwareMonitor when possible.
12. Final Result
The final result is a compact DIY PC status monitor with a laser-cut enclosure, an ESP32, and an external display. It shows live system values directly on the desk and is useful while gaming, editing, rendering, or testing hardware.